Simple DIY Crafts for Beginners: Easy Step-by-Step Projects to Start Today
Simple DIY crafts for beginners: easy step-by-step projects to start today
Introduction
Simple DIY crafts for beginners are a great way to unlock creativity, save money, and make personalized gifts and decor. This article walks you through the basics: essential tools and safety, three quick paper projects to build confidence, a few easy home-decor crafts that use the same starter supplies, and upcycled projects that turn everyday items into useful pieces. Each project includes a materials list, clear step-by-step instructions, estimated time, and difficulty so you can pick what fits your schedule. Follow the sequence from basic skills to slightly more complex projects and you’ll be crafting with confidence in no time.
Getting started: tools and basic skills
Before starting any project, gather a modest tool kit and practice a few core techniques that recur across crafts. A small investment upfront makes projects easier and safer.
- Essential supplies: scissors, craft knife, cutting mat, PVA glue or craft glue, hot glue gun (low-temp for beginners), acrylic paints, paintbrushes, masking tape, ruler, pencil, and sandpaper.
- Safety and setup: work on a flat surface, protect it with paper or a mat, keep fingers away from blades, unplug the hot glue gun when not in use, and use good lighting.
- Core techniques to practice: straight cutting with scissors and craft knife, even glue application, basic paint strokes (base coat and dry brushing), and simple knot tying. Spend 10-15 minutes practicing each; these skills speed up all projects below.
- How this helps: paper folding, neat cuts, and tidy glue work are used in both paper crafts and upcycling. Learning to paint smoothly will improve your pots, jars, and small furniture makeovers.
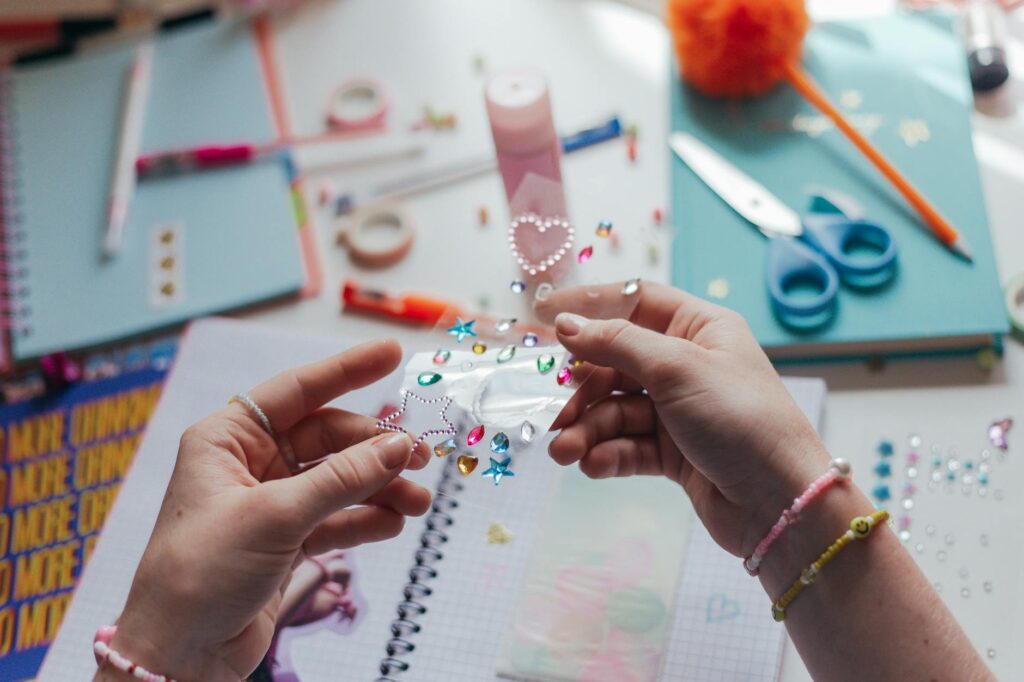
Quick paper crafts to build confidence
Start with lightweight, low-mess projects so you see quick wins. These build the foundation for more involved pieces.
- Origami corner bookmark
Materials: square paper (8 cm), pencil, ruler. Time: 10 minutes. Difficulty: very easy.
Steps: 1) Fold square diagonally to form triangle. 2) Fold top layer corners into the center to form a diamond. 3) Tuck the top triangle flap into the pocket you just created. 4) Decorate with marker or small stickers. Use precise folds from the basics chapter for a neat finish. - Handmade greeting card
Materials: cardstock, scrap paper, glue stick, scissors, marker. Time: 20 minutes. Difficulty: easy.
Steps: 1) Fold cardstock in half. 2) Cut a contrast rectangle from scrap paper and glue to front. 3) Add a simple paper shape (heart, leaf) and a handwritten message. 4) Add a wash of watercolor or a stamped motif. Clean cutting and layering techniques from earlier will make the card look polished. - Paper garland
Materials: colored paper, thread, needle or stapler. Time: 30 minutes. Difficulty: easy-moderate.
Steps: 1) Cut repeated shapes (circles or triangles). 2) Punch holes and string them, or overlap and staple for a quicker method. 3) Hang in a window or on a shelf. This project practices repetition and tidy spacing, useful for later decor projects.
Easy home decor projects
Once comfortable with basic skills and paper projects, try small decor items that use paints and glue. These projects reuse the same tools and introduce texture and finishing techniques.
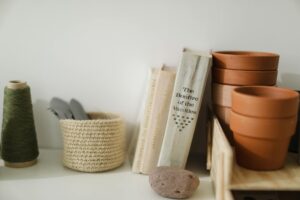
- Painted plant pot
Materials: terracotta pot, acrylic paints, sealer. Time: 45 minutes (+drying). Difficulty: easy.
Steps: 1) Clean and sand pot lightly. 2) Apply base coat and let dry. 3) Add patterns with painter’s tape or a small brush. 4) Seal with a clear sealer. Use paint stroke practice from the basics to avoid brush marks. - Mason jar candle holder
Materials: mason jar, tea light or LED candle, twine, optional glass paint. Time: 20 minutes. Difficulty: very easy.
Steps: 1) Clean jar and paint optional patterns. 2) Wrap twine around the neck and knot or glue. 3) Place a candle inside. This project shows how small embellishments elevate simple items. - Washi tape wall art
Materials: washi tape, mounting paper or canvas. Time: 15-30 minutes. Difficulty: easy.
Steps: 1) Plan a simple geometric layout. 2) Apply tape in straight strips using the ruler for alignment. 3) Trim edges for a crisp frame. The precision you developed in cutting and measuring keeps results clean.
Upcycled projects and how to move forward
Upcycling turns household items into useful crafts and reinforces all skills learned earlier. Start with items you already have and combine techniques: cutting, painting, gluing, and sewing.
- T-shirt tote bag
Materials: old cotton T-shirt, scissors, ruler. Time: 20 minutes. Difficulty: easy.
Steps: 1) Cut off sleeves and neckline. 2) Trim to desired bag length. 3) Tie or sew bottom fringe to close the base. Basic cutting and knotting are all you need. - Tin can planter
Materials: empty can, paint, soil, small plant. Time: 25 minutes. Difficulty: easy.
Steps: 1) Clean and remove sharp edges. 2) Paint the can and add drainage holes if needed. 3) Plant and display. Sealing paint and safe edge handling come from earlier safety tips. - Next steps
Gradually increase complexity by combining techniques: sew a simple pillow using a painted fabric panel, or create a multi-tiered hanging planter using painted jars and rope. Join a local workshop or follow step-by-step video tutorials to develop new skills. Keep a small project notebook to record measurements, colors, and sources of supplies for future reference.
Projects at a glance
| Project | Time | Difficulty | Main skills | Estimated cost |
|---|---|---|---|---|
| Origami corner bookmark | 10 min | Very easy | Folding, precision | Low |
| Handmade greeting card | 20 min | Easy | Cutting, layering | Low |
| Painted plant pot | 45 min + dry | Easy | Painting, sealing | Low-medium |
| T-shirt tote bag | 20 min | Easy | Cutting, knotting | Free |
| Tin can planter | 25 min | Easy | Prep, painting | Free-low |
Conclusion
Simple DIY crafts for beginners begin with a small toolkit and a few practiced techniques. Start with low-mess paper projects to gain confidence, then move to painted decor and upcycling using the same core skills. Each project above is chosen to reuse supplies and reinforce prior learning: neat cuts and steady glue work improve cards, while paint practice yields better pots and jars. Track your projects, note what works, and take photos to build a personal portfolio. With short projects that fit into a spare evening, you’ll progress quickly and enjoy practical results. Pick one project today, follow the steps, and let curiosity guide your next craft adventure.
Image by: cottonbro studio
https://www.pexels.com/@cottonbro