Easy DIY Crafts for Beginners: Quick Materials and Simple Instructions

Introduction
Easy DIY crafts for beginners are a great way to tap into creativity without a big investment of time or money. This guide focuses on quick materials and simple instructions so you can complete projects in an afternoon. You will learn what basic tools to keep on hand, three approachable project types—paper and fabric crafts, upcycling household items, and small home décor pieces—and practical finishing tips that make your projects look polished. Each project uses readily available supplies and step-by-step directions written for first-timers. Whether you want a mindful hobby, a personalized gift, or something attractive for your space, these crafts are designed to build confidence fast and encourage small, satisfying wins.
Getting started: essential materials and tools
Before you begin, gather a compact kit of supplies that will cover most beginner projects. Keep everything organized in a box so projects are easy to start and finish.
- Basic tools: scissors, craft knife, self-healing cutting mat, ruler, pencil, glue (PVA and a glue stick), double-sided tape, hot glue gun.
- Consumables: assorted cardstock and scrap fabric, plain cotton tote or muslin, paint set (acrylic), brushes, twine, washi tape, beads, buttons.
- Safety and prep: small first-aid kit, clamps or clothespins for drying, protective surface cover, and good lighting.
Having a few multi-purpose items—like leftover jars, cardboard, and old T-shirts—keeps costs low and opens up upcycling options. The next chapters show quick projects using these basics.
Quick paper and fabric crafts: simple projects
Start with low-risk, high-reward projects that rely on scissors, glue, and a little patience. These teach cutting, folding, and basic stitching without heavy equipment.
- Washi-tape bookmarks
Materials: heavy cardstock, washi tape, hole punch, ribbon or tassel.
Steps: Cut a 6 x 2 inch strip of cardstock. Cover with overlapping washi tape to create a pattern. Trim edges and punch a hole at the top for a tassel. This project takes 10–15 minutes and is perfect for practicing layout.
- No-sew tote bag decoration
Materials: plain cotton tote, fabric paint or iron-on vinyl, sponge brushes, cardboard to insert inside bag.
Steps: Slide cardboard inside. Use a stencil or freehand a simple design with paint or apply iron-on shapes. Let dry according to paint instructions. Quick, washable, and useful.
- Simple paper lantern
Materials: colored cardstock, glue stick, scissors, string for hanging, battery tea light (optional).
Steps: Fold cardstock in half lengthwise, cut slits 1 inch apart leaving 1 inch on both ends, roll and glue ends to form a cylinder, add a handle. Safe with a battery light and ideal for parties or kid-friendly crafting.
Upcycling and home decor: easy reinventions
Once you’re comfortable with small paper and fabric projects, move to simple upcycling. These projects turn common household items into attractive accents.
- Mason jar candle holder
Materials: cleaned jar, twine, paint or spray paint, tea light or LED candle, optional sand or pebbles.
Steps: Paint or spray the jar for a frosted or colored look. Wrap twine around the neck and tie with a knot. Fill base with pebbles for weight and nestle an LED candle inside.
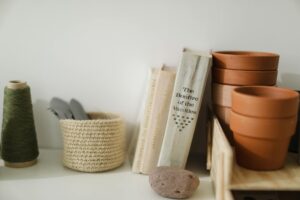
- Painted terracotta pot
Materials: small terracotta pot, acrylic paint, sealer, plant or succulent.
Steps: Base coat the pot, add patterns with a smaller brush or stencil, let dry and seal. Add a low-maintenance plant. Great for gifting and quick satisfaction.
- Clothespin photo holder
Materials: wooden clothespins, small wooden dowel or branch, string, paint, photos or cards.
Steps: Paint clothespins and the dowel if desired. Attach string along the dowel and clip photos to it. Hang on a wall for a rotating display of memories.
Finishing tips: customization, photography, and sharing
How you finish and present a piece matters as much as the build. Small choices elevate a beginner craft into something that looks intentional and durable.
- Edges and seams: sand rough paper edges, seal painted surfaces with a clear coat, and hide glue marks with small decorative elements like buttons or washi tape.
- Color and scale: pick a palette of three complementary colors and repeat them across projects for cohesion in a room or gift set.
- Documenting your work: photograph in natural light against a clean background. Try close-ups of textures and one lifestyle shot to show use.
- Sharing and selling: list materials, time, and care instructions if you share on social platforms or in local marketplaces. Clear descriptions build trust and repeat interest.
Quick reference: projects at a glance
| Project | Materials | Time | Difficulty |
|---|---|---|---|
| Washi-tape bookmark | Cardstock, washi tape, ribbon | 10–15 minutes | Easy |
| No-sew tote decoration | Cotton tote, fabric paint | 20–30 minutes | Easy |
| Paper lantern | Cardstock, glue, battery tea light | 15–25 minutes | Easy |
| Mason jar candle holder | Jar, twine, paint | 20–30 minutes | Easy |
| Painted terracotta pot | Terracotta pot, acrylic paint | 30–45 minutes | Easy |
Conclusion
Easy DIY crafts for beginners are about approachable steps, inexpensive materials, and visible results. Start by assembling a small toolkit and practicing simple paper and fabric projects to build confidence. Move next to upcycled home decor that uses jars, pots, and clothespins to make attractive, functional items. Finish pieces with consistent color choices, careful edges, and thoughtful photos if you want to share or sell. Each project in this guide was chosen to teach a single technique—cutting, painting, wrapping, or arranging—so skills stack naturally. With a few afternoons of practice you will develop a personal style, reduce waste, and create handmade items you’ll be proud to use or give away.
Image by: Ksenia Chernaya
https://www.pexels.com/@kseniachernaya